Tagged: chocolate chip
baking basics: chocolate chip cookies

You guys, I don’t even want to read anyone’s blog today because it’s April Fools Day and it gets confusing because some people are joking and some people are serious and how am I supposed to know?! For example…I totally thought this mango rice with mustard recipe was a big ol’ joke. Nope (and now I feel bad for thinking someone’s potentially delicious recipe was a joke). I also totally thought Joy had flipped out and was being serious for a minute. Oh, April Fools Day. You suck.
I promise this is a real post and nothing is a joke!
I do have a favor to ask of you! On Friday, I’m going to be switching blog hosts, which means I don’t think those of you who have subscribed via email and/or WordPress will transfer over. If you wouldn’t mind — come back to http://www.melbakesthings.com on Friday, and re-subscribe…please? Pretty please? Thank you! In return, I promise to share a bunch of tasty recipes I’ve been stockpiling with you (including maple-bacon cinnamon rolls!). Cool? Now, on to those cookies.

Why chocolate chip cookies? You can never have too many solid recipes for chocolate chip cookies. Every recipe yields a slightly different result based on the format of your butter, the proportions of each kind of sugar you use, and how you incorporate various ingredients into the cookie dough. There’s a really, really awesome article about this from Serious Eats that you should check out if you, like me, are a-ok with geeking out over chocolate chip cookies.
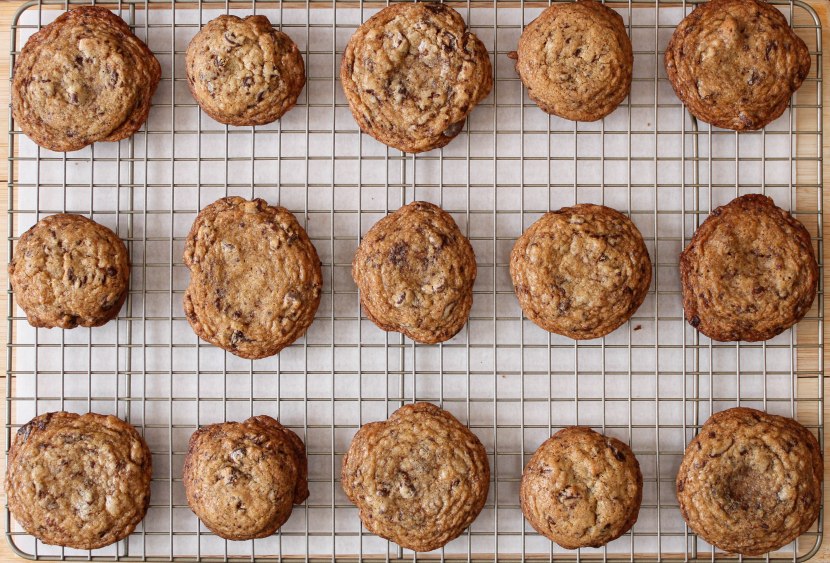
This particular recipe is a chewy guy, slightly crisp around the edges. I like my cookies that way. You can change up the types of chips/chocolate you use in these cookies with no problem, though I find that a combo of bittersweet chocolate and either semi-sweet or milk chocolate does the trick pretty well. During Christmastime, I use a combo of dark chocolate and Andes mints instead. You could always throw a handful of peanut butter chips in if you’d like, but I find that those are better suited for oatmeal cookies. Which I should probably post about sometime soon.
Method: Here’s a sort-of step by step photo tutorial to give you a better sense of what the process looks like…the full recipe is listed at the end of the post.
Step 1: Get your mise en place in place (hah)! Remember, this helps make it so you won’t get halfway through the process and realize you’re missing some ingredient or another.

Don’t forget the chocolate!

Step 2: In the bowl of your stand mixer fitted with the paddle attachment, cream room temperature solid butter (NOT the browned butter) and granulated (white) sugar until light and fluffy.

Step 3: Add eggs, one at a time, beating for 15-30 seconds after each addition to ensure each egg gets fully incorporated. Scrape down the sides and bottom of the bowl.

Step 4: Add vanilla, browned butter, and brown sugar. Mix for another minute. Again, scrape down the bottom and sides of the bowl.

Step 5: Add salt, baking powder, baking soda, and two-thirds of the flour to your mixer bowl. Mix until just combined.

Step 6: Add the rest of the flour and your chocolate. Mix just for a few seconds, until flour is combined.

Step 7: Age your dough in the fridge. Sound crazy? Maybe. Basically, you have a choice here. Fridge your dough for a minimum of two hours. After that, it’s up to you. If you “age” your cookie dough in the fridge overnight, or even over two days, the flavors develop and deepen, which results in an even tastier cookie. I actually baked some of the dough the day I made it, some the next day, and the rest the day after and yes, you can taste a difference. If this is blowing your mind, read that article I referenced earlier in this post. Let your cookie dough sit out for about 20 minutes before scooping.
Step 8: When you’re ready to bake, preheat your oven to 375F and line your baking sheets with parchment.
Step 9: Scoop dough in rounded tablespoons (or in any other desired size — just remember, the size will impact your baking time).

Step 10: Bake for 8-12 minutes, keeping an eye on your first batch so you can get a handle on how the cookie size and oven temp work together.
Step 11: EAT! For the record, these bad boys would be great with some ice cream sandwiched in the middle. Just sayin’.

Baking Basics: Chewy Chocolate Chip Cookies
Click here for a printable PDF of this recipe!
2 cups (8.5 oz) all-purpose flour
1 1/4 tsp salt
1/2 tsp baking soda
1/4 tsp baking powder
1 stick (4 oz) unsalted butter, at room temp
1 stick (4 oz) unsalted butter, browned and cooled (throw an ice cube in to help it cool)
3/4 cup granulated (white) sugar
2/3 cup dark brown sugar
2 tsp vanilla extract
8 to 12 oz chocolate of your choosing (I prefer a mix of chopped and chips, to give variation in texture and chocolate distribution)
Directions:
- In the bowl of your stand mixer fitted with the paddle attachment, cream room temperature solid butter (NOT the browned butter) and granulated (white) sugar until light and fluffy.
- Add eggs, one at a time, beating for 15-30 seconds after each addition to ensure each egg gets fully incorporated. Scrape down the sides and bottom of the bowl.
- Add vanilla, brown sugar, and browned butter and mix for another minute. Again, scrape down the bottom and sides of the bowl.
- Add salt, baking powder, baking soda, and about two-thirds of the flour to your mixer bowl. Mix until combined.
- Add the rest of the flour and your chocolate. Mix just for a few seconds, until flour is combined.
- Age your dough in the fridge. Sound crazy? Maybe. Basically, you have a choice here. Fridge your dough for a minimum of two hours. After that, it’s up to you. If you “age” your cookie dough in the fridge overnight, or even over two days, the flavors develop and deepen, which results in an even tastier cookie. I actually baked some of the dough the day I made it, some the next day, and the rest the day after and yes, you can taste a difference.
- When you’re ready to bake, preheat your oven to 375F and line your baking sheets with parchment.
- Scoop dough in rounded tablespoons (or in any other desired size — just remember, the size will impact your baking time).
- Bake for 8-12 minutes (keep an eye on your first batch to get a sense of how it goes – your time will vary based on your oven!)
- Cool, then EAT! For the record, these bad boys would be great with some ice cream sandwiched in the middle. Just sayin’.
oatmeal coconut chocolate chip cookies

I have a confession to make. I’m that conceited jerk who thinks that they can one-up other people’s cookies.
Okay, not everyone‘s. But if you take me to a bakery or a cafe, I will probably make faces at you if you order a cookie (ask Brandon, I do it to him all the time). I’ll more than likely refuse to try it until you force me, and once I try it, I’ll immediately start thinking of ways to make it better.
That’s how this cookie happened. Continue reading
Chocolate chip cookies and brain-crushes

You know when you get a crush on someone’s brain? It has nothing to do with the actual human, looks, or personality…it’s pretty much all about the information they have stored in that-there noggin. I have a brain-crush on Alton Brown. The dude is a food genius. The amount of food and science-based knowledge he’s got is mind blowing. And I’m totally jealous. His recipes have never failed me, and during the Good Eats marathons that seem to happen pretty often on weekend mornings on the Cooking channel, I’ve learned a ton about techniques and kitchen utensils.
Needless to say, as someone who bakes frequently (I hesitate to call myself a baker because…well…it sounds so professional, which I am not) I was surprised to realize that I had never bothered to test his chocolate chip cookie recipe. My personal preference with chocolate chip cookies is a flat, crispy cookie. However, I’ve realized over the years that most people like fluffy, chewy cookies. Weirdos.
Apparently, the way to a fluffier, chewier cookie is melted butter. And the ratio of brown sugar to white sugar. What? Seriously? That’s it? Well, that and actually weighing your flour and sugar by weight as opposed to volume. Do you have a food scale? Do you use your food scale?
Well, if you don’t have one and you bake often, you should get one. There is definitely a marked difference in products where certain ingredients have been measured by weight. You can find them for pretty cheap. I think ours was about 20 bucks. It is more unusual to find recipes that provide measurements by weight, but they’re out there. And they’re awesome. Alton does it, and so does Christina Tosi of the famed Momofuku Milk Bar. And the folks at America’s Test Kitchen.
Here’s why weighing things like flour and sugar by weight vs. volume is important: Continue reading
Pumpkin Chocolate Chip Cake-Cookies

It’s a bird…it’s a plane…nope, it’s a cake-cookie. The best way I can describe a cake-cookie is basically that it’s the business end of a whoopie pie. They’re fluffy and soft, but they (almost misleadingly) look like cookies. They would be great with a variety of other flavors (banana!!), but since it’s October, they obviously had to be pumpkin. Another recipe borrowed from my favorite baking blog/cookbook author, I switched a few things up from the original recipe. Bread flour instead of all purpose, 1/4c. less sugar, and mace instead of nutmeg.
Do you know about mace? I don’t mean the stuff you spray to ward off bad guys. Mace is actually a spice that also comes from the nutmeg tree. Continue reading
